How to Access the Scheduling Poll in Outlook
Follow these instructions for accessing the Scheduling Poll in Outlook.
1. Login to Outlook on the Web at: office365.siue.edu
2. Compose a new email or reply to an existing email. If composing a new email, add required attendees in the To: field and optional attendees in the Cc: field.
3. Click Scheduling poll:

4. Use the Scheduling Poll sidebar to choose the duration of the meeting. Click the calendar icon to select the date for the desired meeting.

5. The Scheduling Poll will show you the times both you and your invitees are available. Click the Sort by drop-down to filter by Time or Availability. Filtering by Time will show the time of day in chronological order. Filtering by Availability will show the times of the day when all or a majority of attendees are available. All person icons will be green when everyone is available. A red person icon indicates a person is busy on that date and during that time. Hover over the person icons to see who is available and who is not.

6. Click the time options you want to offer your invitees. When selected, a blue check mark will appear next to the time.

7. To add additional dates, click the calendar icon and select multiple date options:

8. Once you have selected the date and time options for your attendees, click Next.

9. Enter a location for your meeting and click Manage poll settings to ensure the poll features are set to your preference. You can remove any selected times by clicking the trash can icon next to each option. Then click Create poll:

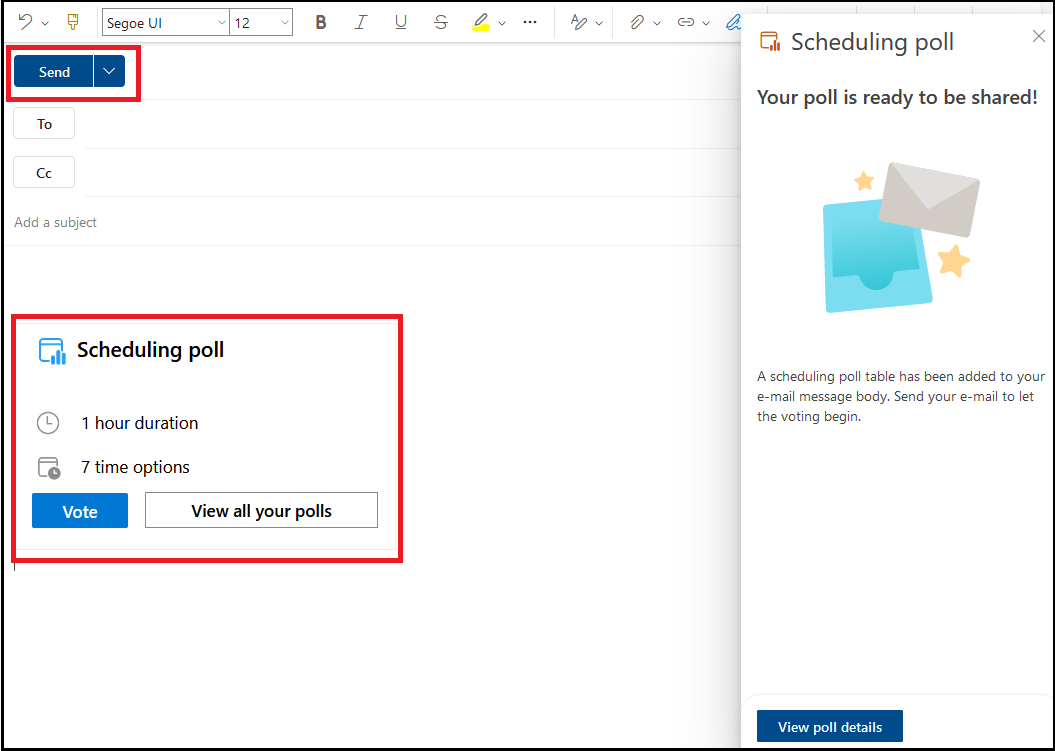
10. Your meeting poll will be inserted into your email and the email recipient(s) will have the ability to select which meeting date/time they prefer. Click Send to send the email and poll:
11. You will receive email confirmations as your attendees submit their preferred meeting times. If selected in your meeting poll options, when attendees select a unanimous date and time, the meeting will be automatically scheduled and added to the recipients' calendar.
12. Click View all your polls, to view your Poll Dashboard:

13. In the Poll Dashboard, you can edit or cancel open polls and view the settings of a specific poll. You can view attendee responses by clicking on a specific meeting title. Click Default Poll Settings to view and manage your default settings.


For more detailed instructions, visit https://support.microsoft.com/en-us/topic/access-scheduling-poll-a8742e97-0b59-45c4-9359-23b582c64a27#:~:text=Create%20a%20new%20email%20or,existing%20event%20to%20edit%20it.