Starfish - How to Add Less Structured Office Hours (Faculty & Staff)
Explains how to add less structured office hours in Starfish using the Scheduling Wizard.
The Add Office Hours option is geared toward setting up a recurring block of time on a regular pattern such as weekly or daily at a certain time. If you want to set up a group of Office Hours that are less structured (for example, blocks of time for advising appointments), use the Scheduling Wizard. This feature is particularly useful for advising rush weeks, midterm course meetings, or other scenarios where you need to hold several different office hour sessions for students within a week or two.
1. Login to Starfish
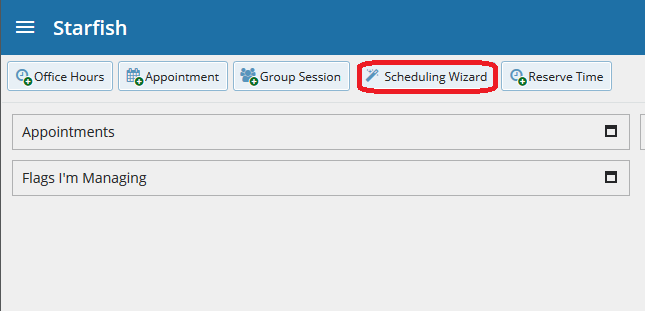
2. Click the Scheduling Wizard button along the top of the home screen in Starfish:
3. Complete the first page of the scheduling wizard by entering the Title, location (Where?), duration (How long?), Appointment Types and Instructions that should be applied to all of the office hour blocks that are to be created.
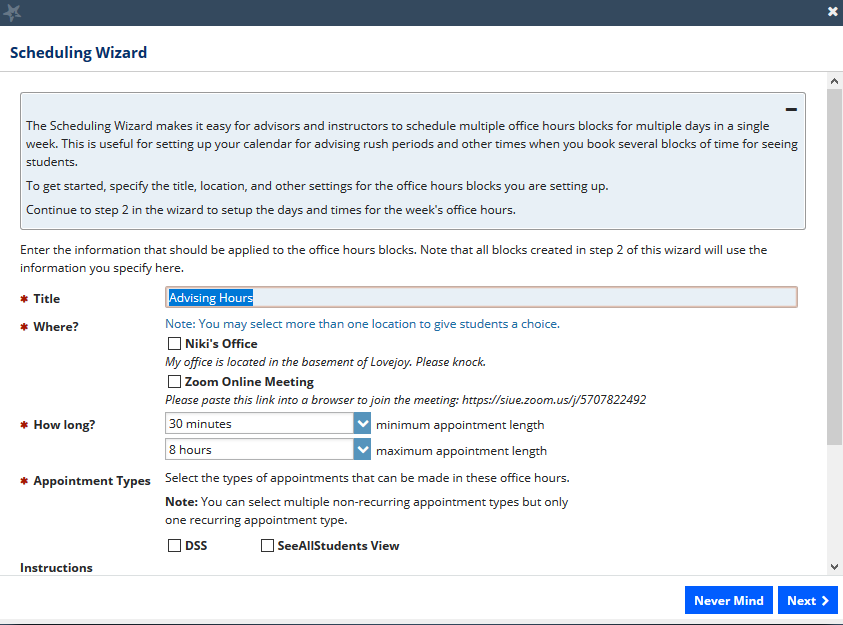
- Title: Enter a name for this block of time. Students will see this name when they view your calendar. The title will also help you keep track of different types of office hours you have established.
- Where?: Select where meetings will be held using the checkbox(es) next to your location(s). The location options are pulled from the Appointment Preferences section of your profile. If you choose more than one location, the student will be able to choose his/her preferred location for the meeting. To add additional location options, go to the Appointment Preferences section of your profile.
- How long?: Select how long meetings can be by selecting a minimum and maximum duration. If the minimum and maximum are identical, the student will not be given a choice of duration.
- Appointment Type: If your role has permissions to add more than one appointment type, you will see checkboxes that allow you to select which types apply to this block of time.
- Instructions: Use the instructions box to enter instructions to students scheduling with you during this block of time. Instructions are required for blocks that allow Walk-ins.
Note: Any office hour block that does not share these details must be created separately.
6. Click the Next button.
7. The date and time page of the wizard is displayed using a Monday through Friday grid for the current week. The date range is displayed in the top right corner of the grid.
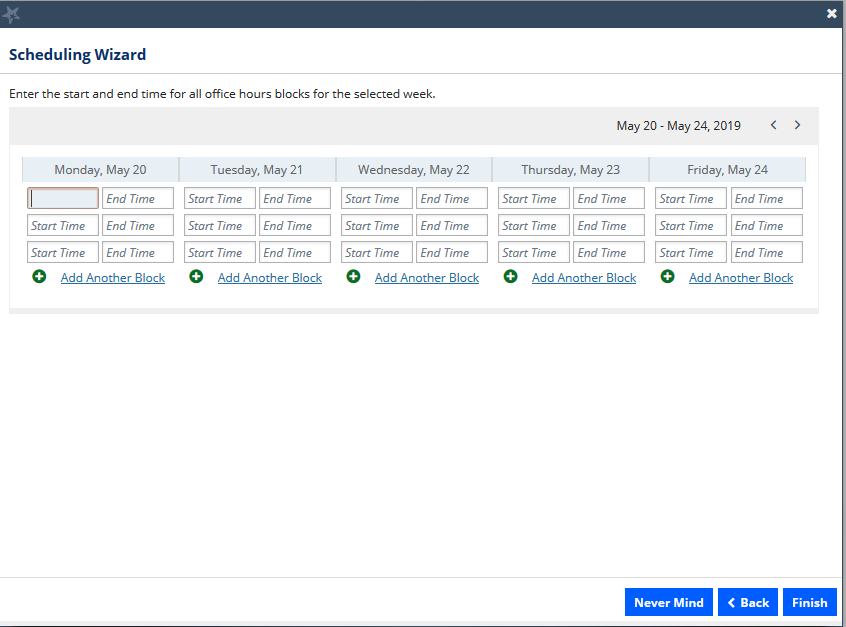
8. Use the < > controls to the right of the date range to navigate to the week in which you want to begin scheduling the office hours.
9. In the selected week, enter the start and end times for each block in the appropriate day columns. You can schedule multiple office hour blocks on any day within the week. If you need to schedule more than three blocks on any day, select the Add Another Block link in the column for that day.
10. To add blocks to another week, use the < > controls to move to the next week. Don't click finish until you've entered all of the blocks!
11. Click the Finish button to create all of the office hour blocks. A summary will be presented. The summary will include a list of hours that could not be created due to conflicts between the blocks you specified and existing calendar items. Make a note of failed blocks before clicking Finish to exit the wizard.
More resources can be found on the Starfish webpage here: http://www.siue.edu/its/starfish/