Starfish - How to Make Appointments in Starfish (Faculty & Staff)
Explains how to schedule an appointment in Starfish.
1. Login to Starfish
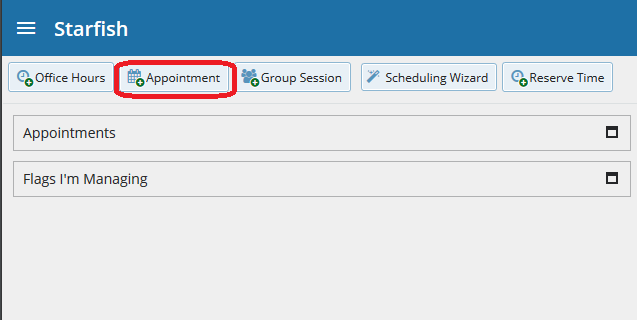
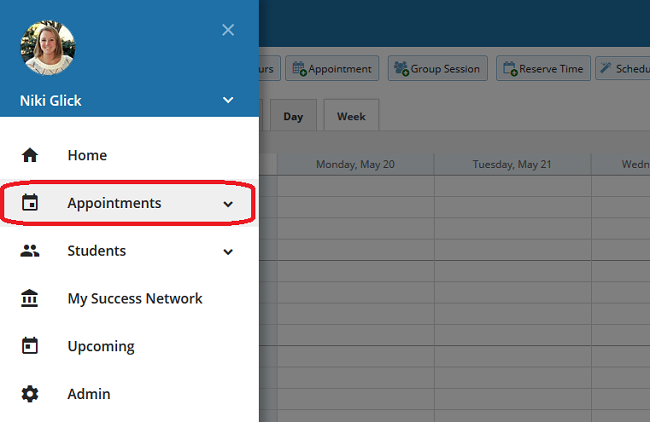
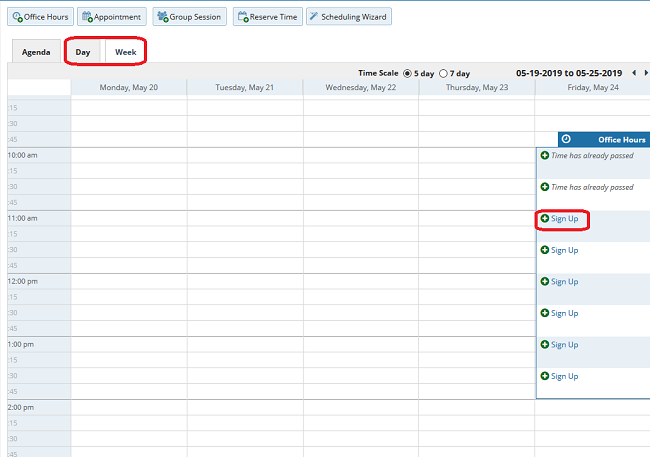
2. Initiate a new appointment using either of these options:
- Click the Add Appointment button from your Home page:
- Access the Appointments page by clicking the three horizontal lines in the top left of the window then click Appointments:
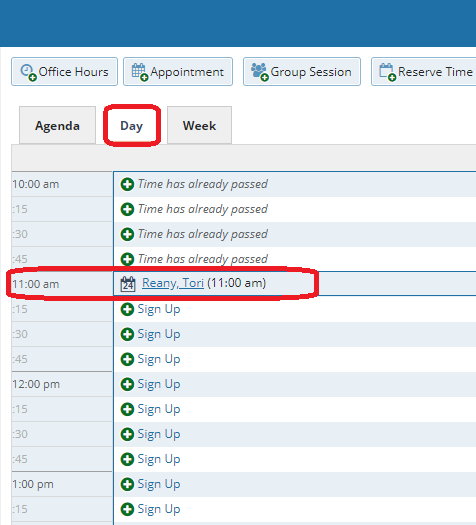
- Then, click the sign up icon (green plus sign) for an existing office hour slot using the Day or Week view of your calendar:
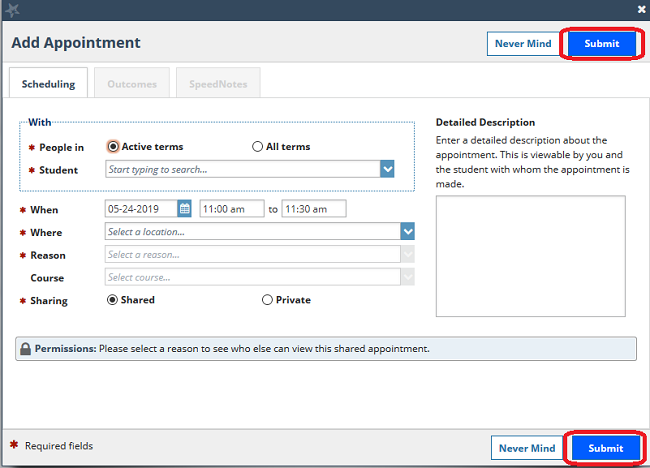
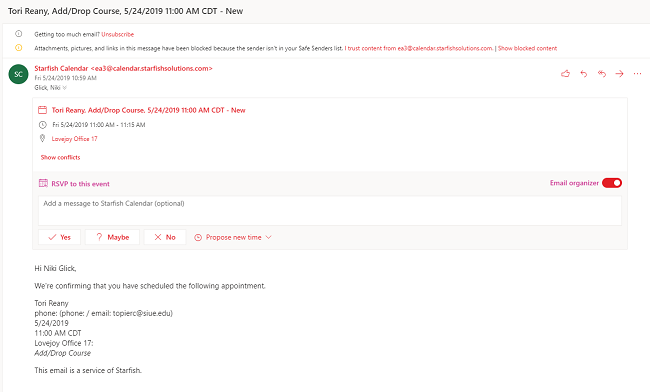
3. This opens the Add Appointment form:
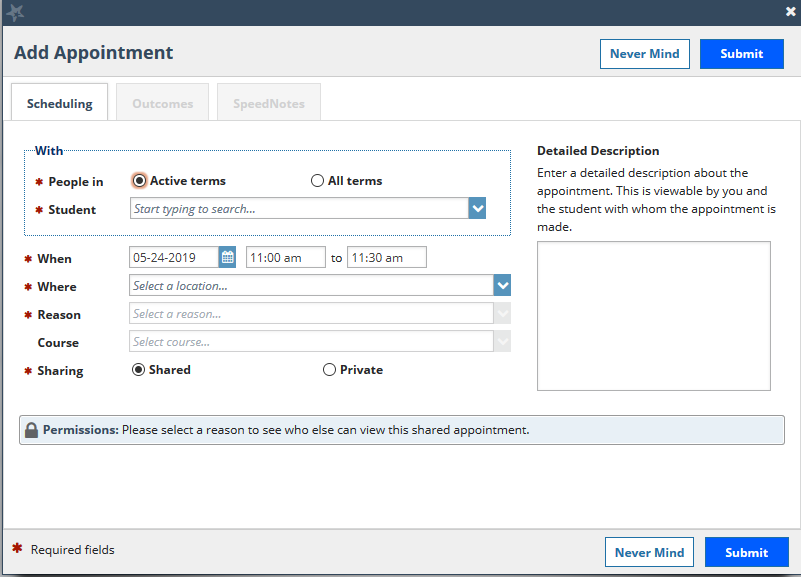
4. Begin typing the name of the desired student into the Student drop down list box. Starfish will find matching students with whom you have a relationship. Select the desired student from the list. If you start the appointment from an existing office hour block, the “appointment types” setting in that block may further limit the students available in your list.
5. If you used the Add Appointment button rather than selecting an existing time slot, specify when the meeting will take place (date, start time, end time).
6. Select the desired location from the options available in the When drop down list.
7. Select a Reason for the meeting. The reasons available are based on the student you selected and the appointment types that you have access to in your role/ relationship with that student. If you have selected a timeslot from a set of existing office hours, the reasons will be further limited to those associated with the appointment types settings for the office hours. Note: Each reason is tied to an appointment type. Each appointment type defines which roles may view or modify an appointment of this type, and what SpeedNotes will be available. Once you choose a reason, information about which other roles have permission to see the appointment will be shown in the section labeled Permissions.
8. If relevant to the meeting and permitted by your role, select a Course from the list presented.
9. Select a radio button for Sharing to either make the appointment Shared (roles listed in the Permissions area for this student can see the appointment and its outcomes) or Private (only the person with whom the appointment is made can see it)
10. Type a Detailed Description for the meeting that will be visible/emailed to you and the student. Best Practice: This is optional but recommended to set expectations for the meeting.
11. Click the Submit button to schedule the meeting:
12. The appointment will appear on the calendar owner’s calendar in the selected date and time:
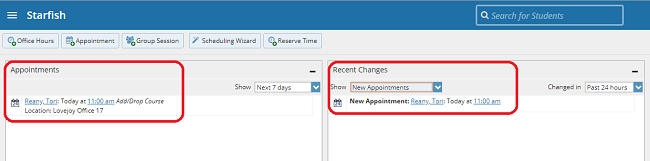
13. The appointment is also available from the calendar owner’s Home page on the Appointments and Recent Changes channel:
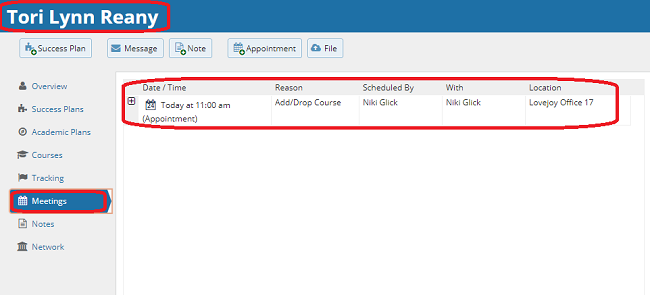
14. The appointment will also appear on the Meetings tab of the student folder for anyone that has permission to view the appointment. If you included a detailed description, it will be listed on the Meetings tab:
15. Both the student and calendar owner will receive an email with an iCalendar attachment for any future appointments. Appointments created to document prior meetings will not send an email. If you do not receive an email, check your Email Notification settings:
More resources can be found on the Starfish webpage here: http://www.siue.edu/its/starfish/