This article walks you through how to add watermarks, blur a section of the video, and add a virtual background with the YuJa video editor.
Before making any edits to a video, it is a best practice to make a copy of the video for a back-up. In the event that an error is made editing the video, the back-up will provide access to the original content.
Follow these instructions to make a copy of the video.
The three image tools are:
Insert Watermark or Overlay
A watermark is semi-transparent text placed over a video to indicate things like copyright or that the video is a draft. Because viewers cannot remove the watermark, ensure it does not block important content on the screen.
An overlay is text added to the screen that is not faded. Overlays can be used to display information such as a webpage URL (not clickable), speaker names, a logo, or other on-screen details.
Both the Watermark and Overlay must be images (.png, .jpg, .gif, or .jpeg) and must be formatted to appear exactly as you want them to appear on the video in your saved image file, regarding color, transparency, and size. Watermarks are traditionally white text that is semi-transparent. Overlays will be any color that the image text is in. The only edits you can make within YuJa are the length of time the watermark or overlay display and the location on the video.
- Navigate to the video's thumbnail and select Edit from the menu.

- If the Advanced Mode is not already Yes, toggle the Advance Mode to Yes.

- Click Watermark from the video editing menu.

- Click the Upload Media button and choose the watermark or overlay file from your computer.

- The "Video 1" displays a thumbnail of the video. Enter the Duration of slide override in seconds, or check the Apply Watermark to Entire Video checkbox to apply it to the whole video.
- Click Apply.

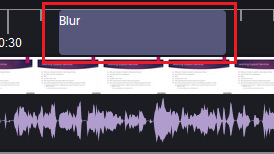
- The watermark will appear as a pink box on the timeline.

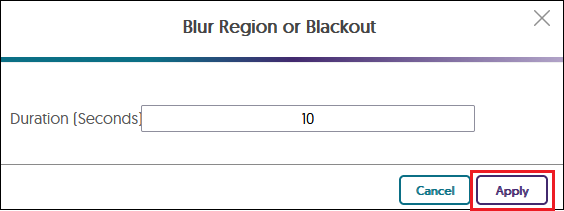
- To change duration, double-click on the watermark box. Click the Apply button.
- If the watermark is in the wrong place, hover your mouse over the watermark and click the X in the upper right corner to delete it.
- Continue editing or click the Save button at the top of the page. If this is a duplicate video from the original, click Replace Existing Video. If you did not make a duplicate, it is a best practice to keep the original for archive purposes and click Save as New Video.

- The watermark will appear in the middle of the screen. Drag and drop it to a location where it will not interfere with the content. Click the Delete button on the watermark to delete it.

- Overlays will appear in the middle of the screen too. Move them to a location that will not interfere with the content.

Insert Blur
The Blur tool allows you to blur out a section of video for a limited duration. This option may be needed if sensitive information (e.g., social security numbers, grades, student images, etc.) is displayed and should be hidden.
Add Virtual Background
Adding a Virtual Background may be necessary if the current background is distracting or to maintain the privacy of your personal location. This includes, for example, a messy office, home, etc. The YuJa AI will replace the static background with an image, leaving the human in front.
- Navigate to the video's thumbnail and select Edit from the menu.

- If the Advanced Mode is not already Yes, toggle the Advance Mode to Yes.
- Play or scrub the video to the point on the video where the virtual background will begin or leave the timeline at the beginning if the virtual background will cover the entire video. Select the Image Tools icon. Click Add Virtual Background from the menu.

- Click on Select File to upload an image file from your computer. Images should be .png, .jpg, .gif, or .jpeg.

- After you have selected the image, confirm the image you selected is correct. Confirm what video is being replaced. If you have more than one video stream select the correct one. Click the Apply button at the bottom of the window.

- A thumbnail with the replaced background will give a preview of what the background will look like.

- Click Close at the bottom of the window. Continue editing or click the Save button at the top of the page. If this is a duplicate video from the original, click Replace Existing Video. If you did not make a duplicate, it is a best practice to keep the original for archive purposes and click Save as New Video. After processing the original background will be replaced with the new virtual background.