Blackboard (Faculty) - Respondus: Publish to Blackboard
Respondus can upload questions directly into your Blackboard course(s) in two ways: 1) Publish test directly to a content area such as Coursework or a weekly folder. 2) Publish questions into the Tests, Surveys, and Pools area under Course Tools as a test or pool. Using either method is acceptable, it is a preference of whether you want to set the test settings inside of Respondus or Blackboard.
Publish to Tests, Surveys, and Pools
- Open or import a test into Respondus.
- Click the Preview & Publish tab.

- Click the Publish to Blackboard tab.
- Click the Publish Wizard button.

- If you are publishing the test to only one course, accept the default "Publish to single course." If you are publishing the same test to multiple courses, click the radio button for Batch Publish to multiple courses.

- If you have not yet set up a server connection to Blackboard, click on the - add new server - drop-down box. If you have set up a server already, skip to step 9.

- A new box will pop up. Accept the default "Yes, check for preconfigured server settings." Click the Next button.
-
Enter a name for the server. This server will be for all of your classes so you do not have to name it by the class. "SIUE" or "Blackboard" is a good name.
- Click on the Next button. (You will notice that the login information boxes are grayed out. If adding a new server.)
- A pop-up window will appear. Click the OK button to close the pop-up window.

- If you are using Respondus for the first time, or if you have just updated Respondus, you will receive a pop-up error titled Helper Tool Download. Click the OK button in this popup and Respondus will download an ad-on it needs to enable you to log in to Blackboard. The pop-up from the previous step will reappear. Click OK to continue.

- A browser window with the Blackboard login will open up. Log in to Blackboard.
- Close the browser window after you have logged in. Click the Close After Login button in the upper right corner of the window.

- When the browser window closes, another pop-up window will appear. Click the OK button to close the pop-up window.

- You will be back at the "Publish Wizard" window. Choose your Blackboard course(s) in which to publish.
- If this is a new exam, accept the radio button for "Create new Exam." Give the exam a name. This is the name that will appear as the exam in Blackboard.
If you are replacing an exam, click on the radio button for "Replace existing Exam." From the drop-down list, select the exam you are replacing. - Uncheck the 3 boxes at the bottom of the window under number 3 (Additional options for Exam/Survey).
- Click the Next button.
- Wait until "Completed successfully " appears in the status box. This may take a few minutes depending upon the length of your test.
- Click Finish.
- Open Blackboard and enter the content area where you want to place the exam (i.e. Coursework>Week 3).
- Deploy the test in the content area. Click the + below for instructions.
-
Deploy Test in Content Area
Deploy Test in Content Area
Once a test or survey is created, it must be deployed or linked within a content area or folder.
- Select the content area or folder you wish to deploy the test or survey (e.g. "Week 1").
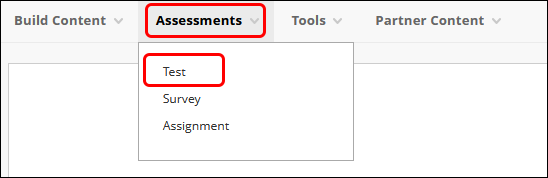
- From the menu bar, click on Assessments, then click on Tests (or Survey).
- Select the test from the list. (The most recently created tests are at the bottom of the list. Tests are not in alphabetical order.)
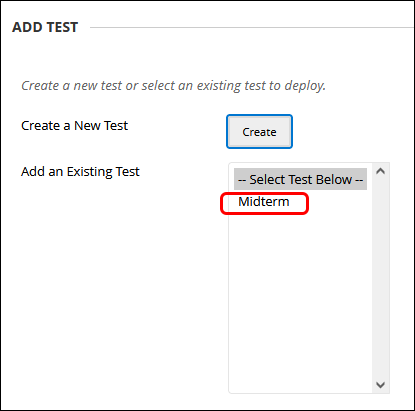
- Click Submit.
After clicking Submit, you will come to the "Test Options" page, where you can set the availability, time, and feedback settings.
NOTE: The test is not available until you make it available within the settings.Test Options
Test Information
Name: The name originally given to the test is displayed. You may change that name here if you wish.
Content Link Description: The description has also carried over from when you created the test if you created one. This may also be changed here.
Open test in a new window: This option defaults to no. Opening the test in a new window will allow students the option to search the course for materials or open other browser windows while the test is still open. If you do not want this, leave the option No.
Test Availability
Make link available: Set to Yes. This must be set to Yes if you have display restrictions set (see below).
Add a new announcement: Yes will send an announcement when the test becomes available.
Multiple Attempts: Check this box if you wish to allow your student to take a test more than once. Once the box is check, determine if you want to allow:
- Unlimited attempts - useful if the quiz is meant for students to check their understanding or gain practice with material.
- Number of attempts - useful if faculty wants to grade highest or average score of multiple submissions; also useful to use "on the fly" if a student loses access to quiz due to a technical or network issue and needs to get back into the test. Note: each attempt takes the student back to the beginning of the test.
Each attempt will be saved and you will be able to see the results separately.
Score attempts using: Select which attempt will be calculated into the Grade Center.
Force Completion: Once started, the test must be completed. It can not be saved and returned. If this option is selected, students cannot close the test window for any reason - including a dropped internet connection. Once the window is closed, they cannot get back into the test, even if time is left on the timer. The faculty member would need to go back and "Ignore the attempt" in the Grade Center to let the student back in. The student would start the new test attempt at the beginning.
Set Timer: This option is recommended to limit the time students spend on the test. Estimate how long it should take students to answer each question and give a little extra time. For example, if the test has 25 multiple-choice questions, allow 30 minutes to take the test. This will help ensure that the students do not have time to look up answers online or from a textbook.
Auto-submit: When the auto-submit is on, the test will save and automatically submit when the time has expired. With auto-submit off, the user will be given the option to continue after the time expires, but the test will be flagged as "Late" in the Grade Center.
Display After and Display Until: The Display After and Display Until dates control when students are able to see your exam in the course. This does not determine how long a student can take the test (Set Timer). For example, if the link to a test is set to display until 10 p.m. and the students have 1 hour to take the test, the students can click on the test link as late as 9:59 p.m. and have until 10:59 p.m. (1 hour) to finish the test. (Note: If your test has images, students must complete the exam prior to the Display Until date or the images will be broken.)
Password: This is optional. A password typed in here must be given to the students or they will not be able to access the test. When using Respondus Lockdown Browser, do not put a password in this box.
Test Availability Exception
This area is used to override the above settings for individual students or groups. This is where you identify students who need extra time to take a test for accessibility reasons, or for a student that needs to retake a test or take it at a different time.
Due Date
The Due Date will trigger notifications for students and will mark submissions as "Late" in the Grade Center if you allow late submissions. Checking the box "Do not allow students to start test..." will make the test unavailable after the due date, no matter what settings are set in the "Test Availability" or "Test Availability Exception" sections. If you use Display After and Display Until dates, you do not need to select the "Do not allow students to start test..." setting.
Self-Assessment Options
Accept the defaults in this section.
Show Test Results and Feedback to Students
Set these settings for students to see the feedback after taking the test. To see what the students see as a result of the selected settings, see Test Settings-Showing Feedback knowledge base article.
Test Presentation
Choose between "All at Once" or "One at a Time." If you select "One at a Time," you have the option to select "Prohibit Backtracking." Note: if you are using Respondus Lockdown Browser, do not select "Prohibit Backtracking." There is a known issue with this combination.
Randomize Questions: This option is suggested as a way to help discourage cheating.
Click Submit when finished.
- Select the content area or folder you wish to deploy the test or survey (e.g. "Week 1").
Publish to a Content Area
Settings
- Open or import a test into Respondus.
- Click on the Settings tab.

- Click on the Availability tab.

- Set the settings as you wish them to appear in Blackboard. Any of these settings can be changed or overridden once the test is in Blackboard.
- Click on the Other Settings tab.

- Set the settings as you want them to appear in Blackboard. Any of these settings can be changed or overridden once the test is in Blackboard.
Preview & Publish
- Click the Preview & Publish tab.
- Click the Publish to Blackboard tab.
- Click the Publish Wizard button.
- If you are publishing the test to only one course, accept the default "Publish to single course." If you are publishing the same test to multiple courses, click the radio button for Batch Publish to multiple courses.
- If you have not yet set up a server connection to Blackboard, click on the - add new server - drop-down box. If you have set up a server already, skip to step 9.
- A new box will pop up. Accept the default "Yes, check for preconfigured server settings." Click the Next button.
- Enter a name for the server. This server will be for all of your classes so you do not have to name it by the class. "SIUE" or "Blackboard" is a good name.
- Click the Next button (You will notice that the login information boxes are grayed out. If adding a new server.)
- A pop-up window will appear. Click the OK button to close the pop-up window.
- If you are using Respondus for the first time, or if you have just updated Respondus, you will receive a pop-up error titled Helper Tool Download. Click the OK button in this popup and Respondus will download an ad-on it needs to enable you to log in to Blackboard. The pop-up from the previous step will reappear. Click OK to continue.
- A browser window with the Blackboard login will open up. Log into Blackboard.
- Close the browser window after you have logged in. Click the "Close After Login" button in the upper right corner of the window.
- When the browser window closes, another pop-up window will appear. Click the OK button to close the pop-up window.
- You will be back at the "Publish Wizard" window. Choose your Blackboard course(s) in which to publish.
- When the browser window closes, you will be back at the "Publish Wizard" window. Choose your Blackboard course(s) in which to publish.
- If this is a new exam, accept the radio button for "Create new Exam." Give the exam a name. This is the name that will appear as the exam in Blackboard.
- If you are replacing an exam, click on the radio button for "Replace existing Exam." From the drop-down list, select the exam you are replacing.
- If you have set exam settings in the previous section, accept the default check box for "Apply Settings to Exam." Again, any settings that are set using Respondus can be changed or overridden in Blackboard.
- If you wish for the exam to be linked in a content area, accept the default check box for "Link Exam to Content Area and make available." (Note the availability will be dependent upon the setting from the previous set.)
- Click the Next button.

- Select the Content Area or folder that you wish the exam to be linked in. This step will not appear if you unchecked the "Link Exam to Content Area and make available" box.
- Click Next to continue.
- Wait until "Completed successfully " appears in the status box. This may take a few minutes depending upon the length of your test.
- Click Finish.
- Return to Blackboard and check your settings.
See Also
- Blackboard (Faculty) - Respondus: Download Respondus
- Blackboard (Faculty) - Respondus: Question Format
- Blackboard (Faculty) - Respondus: Import Questions Into Respondus
- Blackboard (Faculty) - Respondus: Print an Exam Using Respondus
- Blackboard (Faculty) - Respondus: Download an Exam From Blackboard into Respondus
- Blackboard (Faculty) - Respondus: Check for Latest Version